How to Design a Functional Studio Apartment Layout for Small Spaces
Studio living gets a bad reputation. People imagine a sad twin bed shoved against a kitchen wall and a folding chair pretending to be a living room. Here’s the thing — a studio can feel like one of the most intentional, charming homes you’ve ever lived in. It just takes a layout that works for how you actually live, not one borrowed from a 1,200 sq ft Pinterest dream.
I’ve helped friends, readers, and my own past-self figure this out the hard way. So let’s talk about how to lay out a studio that has zones, breathing room, and a personality — without knocking down a single wall.
1. Zone First, Furnish Second
Before you buy anything, mentally divide your studio into zones: sleep, lounge, work, eat. Even a 300 sq ft box can have four functions if you assign each one a “corner.” The mistake most people make is shopping for furniture first and trying to fit zones around it. Do the opposite.
Stand in the middle of your space and ask: where does light come in? Where’s the kitchen? Where will the bed feel most tucked away? Your sleep zone almost always wants to be the furthest spot from the door — psychologically, you want to walk into a room before you fall into bed.
Pro tip: Sketch it on paper before you move anything. I know it feels silly. Do it anyway. Twenty minutes with a pencil saves you a Saturday of dragging a couch around.
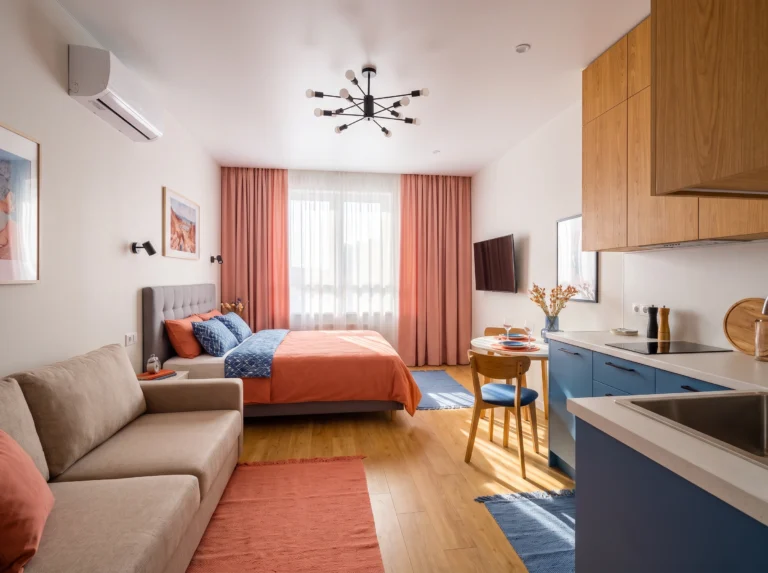
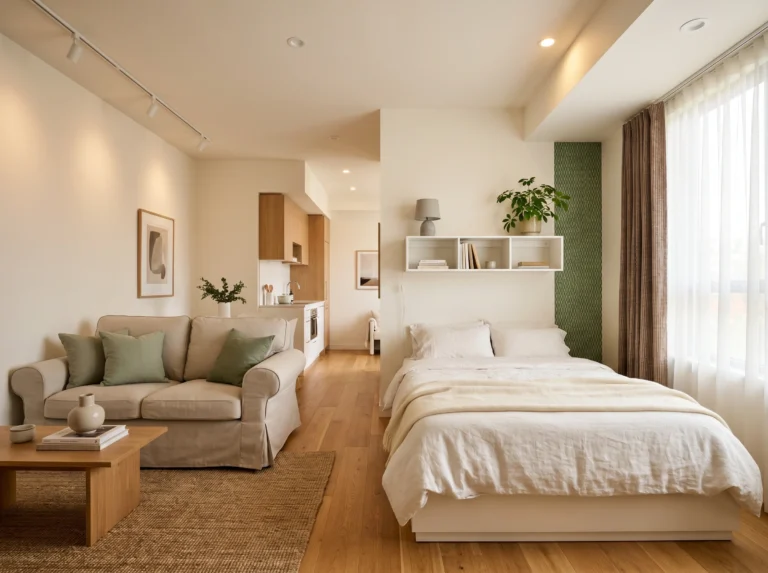
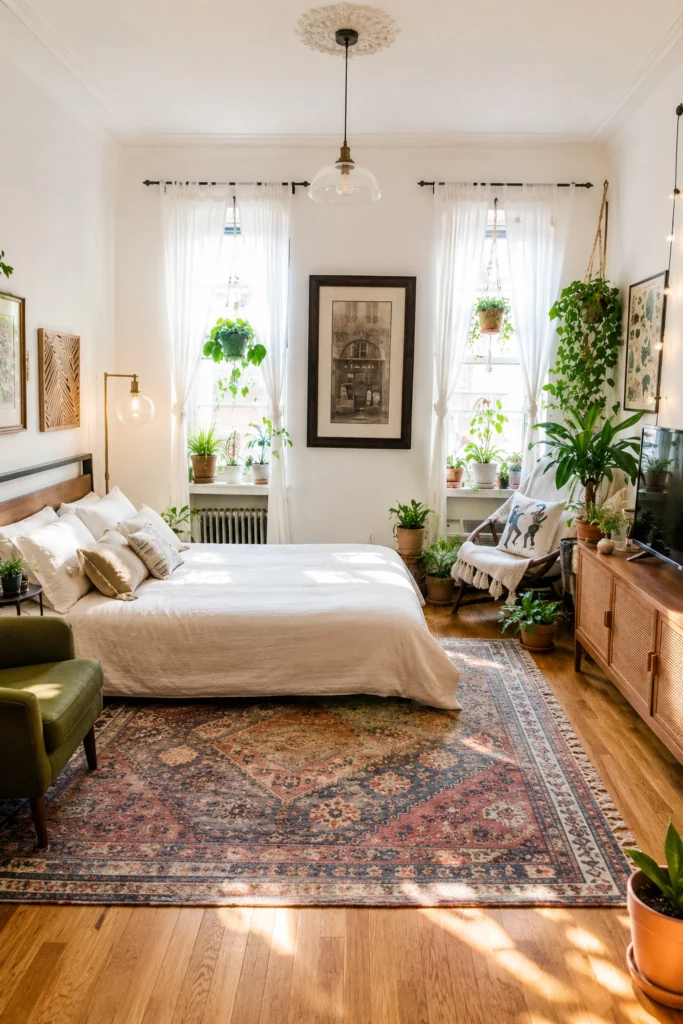
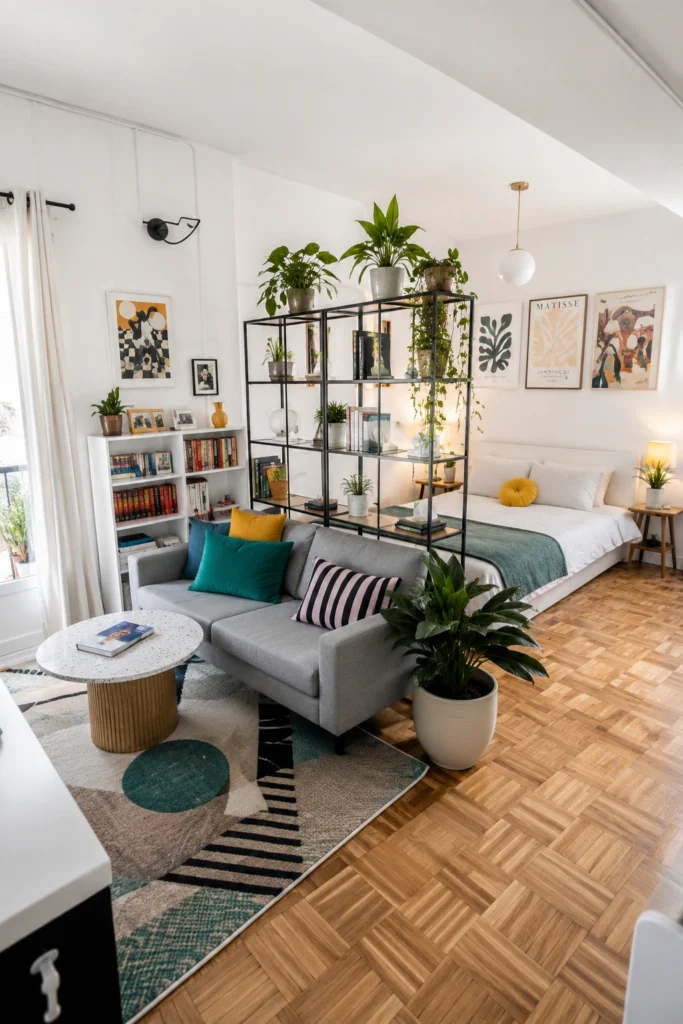
2. Use a Rug to Build Walls You Can’t See
A rug is the cheapest “wall” you’ll ever buy. In a studio, two well-placed rugs visually split the space into two rooms — even if there’s nothing physical between them. One rug under the bed, one under the seating area. Suddenly you have a bedroom and a living room, not just “a room with a bed in it.”
Make sure each rug is big enough to actually anchor the furniture sitting on it. A tiny 3×5 rug floating in the middle of a sofa setup makes the whole space look like an unfinished apartment showing. Go bigger than you think — at least the front legs of every piece should sit on the rug.
I’ve lived with a rug that was two sizes too small for three years out of stubbornness. The day I finally swapped it for a proper 8×10, the whole studio looked twice as expensive. Don’t be me.
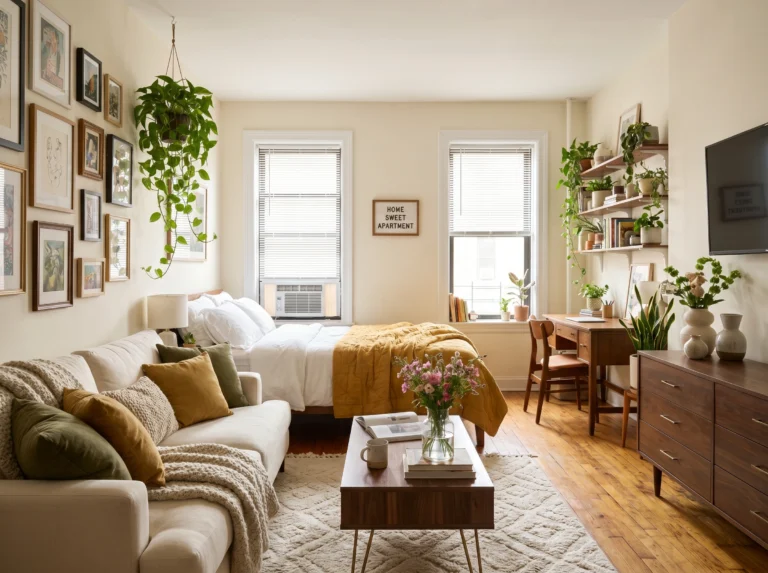
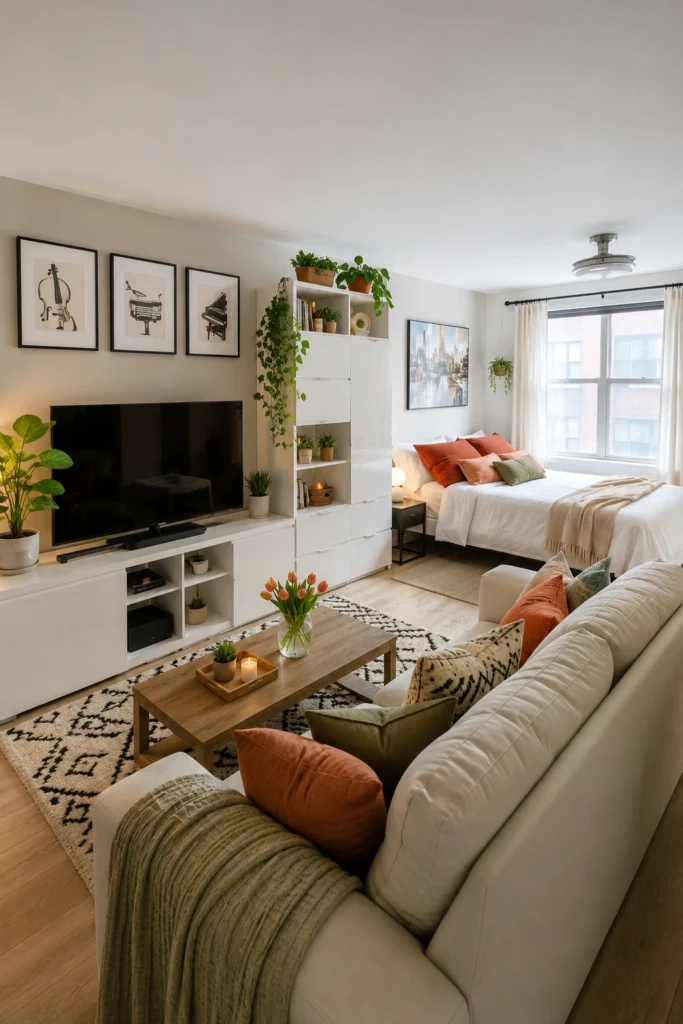
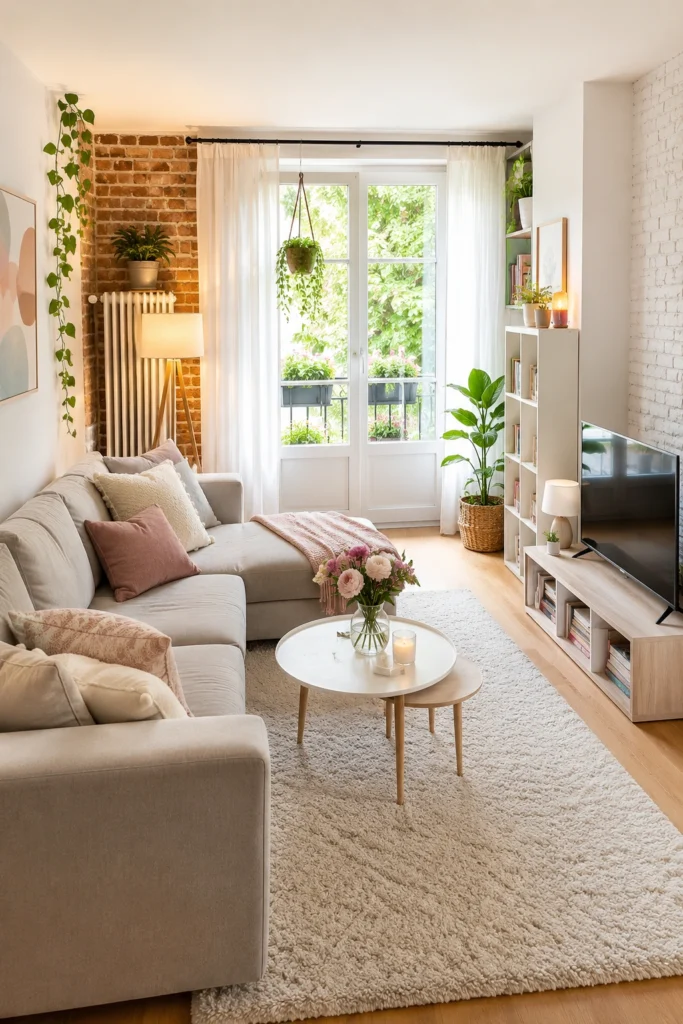
3. Go Vertical With Plants and Wall Art
In a small space, the floor is precious real estate. Your walls are not. Hang plants from the ceiling, stack art frames floor to ceiling, install slim wall shelves for books and ceramics — anything to draw the eye up and trick the brain into reading the space as taller and bigger than it is.

Trailing plants are especially good for studios because they soften hard corners and add life without taking up floor space. Pothos, philodendron, string of pearls — all forgiving, all gorgeous, all under $20 at most plant shops.
My tip: Hang one piece of art higher than feels natural. Most people hang things too low. Trust the slightly-higher impulse — it lifts the whole room.
4. Combine Living and Dining With One Smart Table
If you have room for a dining table, pick one that earns its keep. A round wooden table can be your dining spot, your work-from-home desk, and your friends-over-for-wine-spot — all on the same square footage. Bonus: round tables feel less aggressive in tight spaces because there are no sharp corners to bump into.
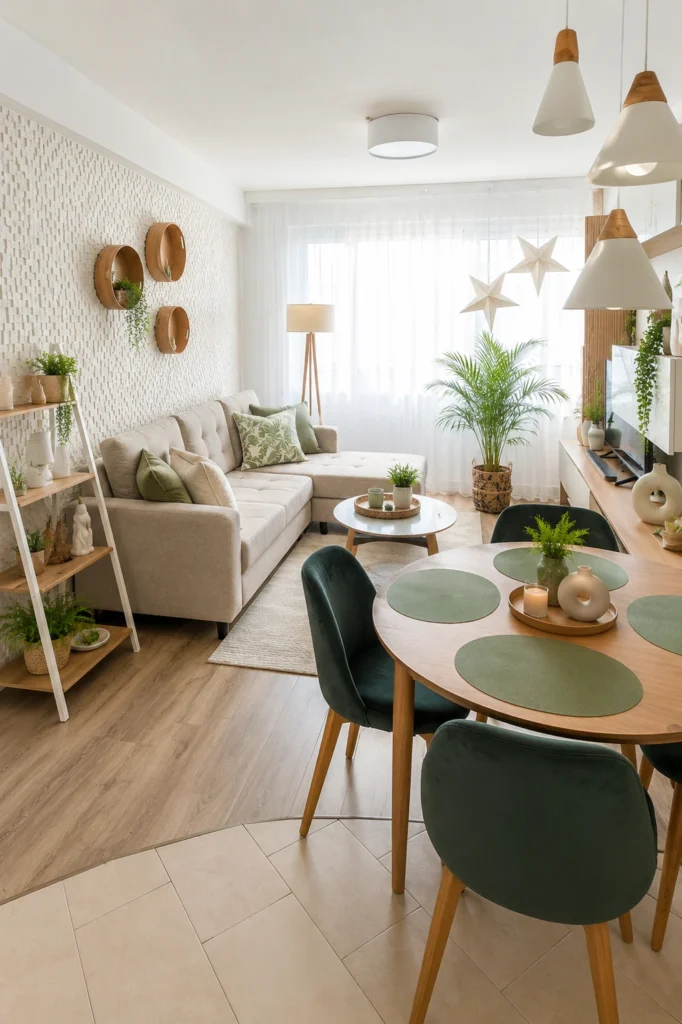
Pair it with chairs that double as extra seating for guests. Velvet upholstered dining chairs look great pulled up to the couch when people come over. You’re not “buying a dining set” — you’re buying four chairs and a surface that all multitask.
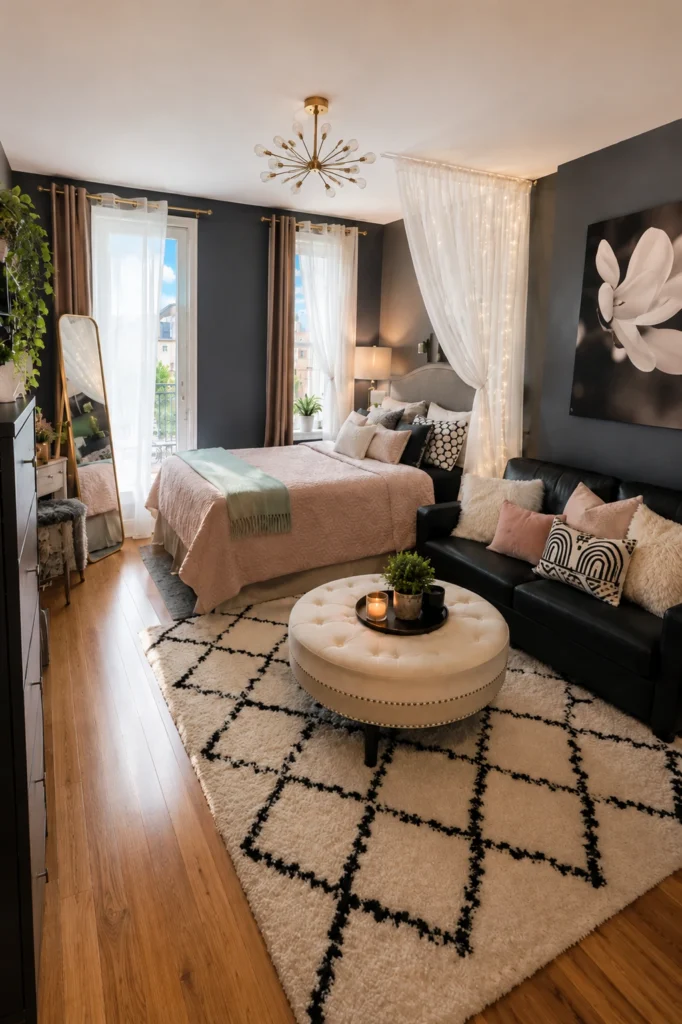
5. Embrace Floor Seating and Low Furniture
Low furniture makes ceilings feel higher and rooms feel airier. A floor cushion or a pouf in place of an extra chair takes up half the visual space and can be tucked under a coffee table when you don’t need it. Same for low coffee tables — they keep sight lines clean across the whole studio.
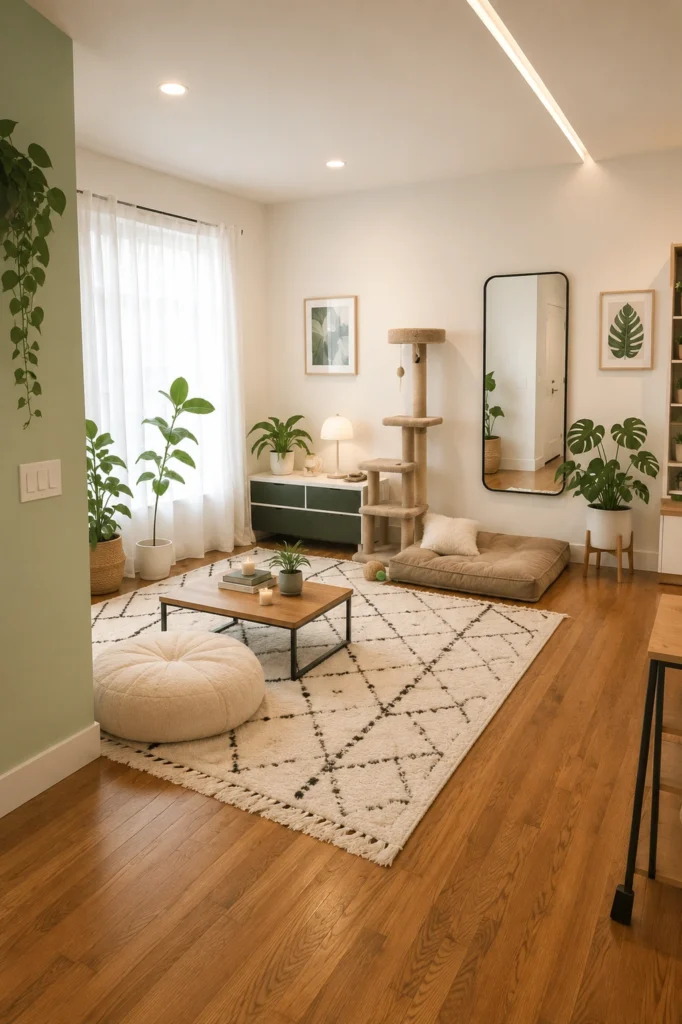
This is also the easiest layout style to live with if you have a pet. Low furniture means fewer things for them to knock over, plus you actually have floor space for a pet bed or a cat tree without it dominating the room.
Pro tip: Leave at least one “empty” zone in your studio. Negative space isn’t wasted space — it’s the visual breath that makes everything else feel intentional instead of crammed.
6. Choose Furniture on Wheels (Seriously)
This is the small-space tip nobody talks about enough: put your furniture on wheels. A rolling kitchen cart, a coffee table on casters, a small console you can move when you need floor space for yoga or guests. Flexibility is the whole game in a studio.
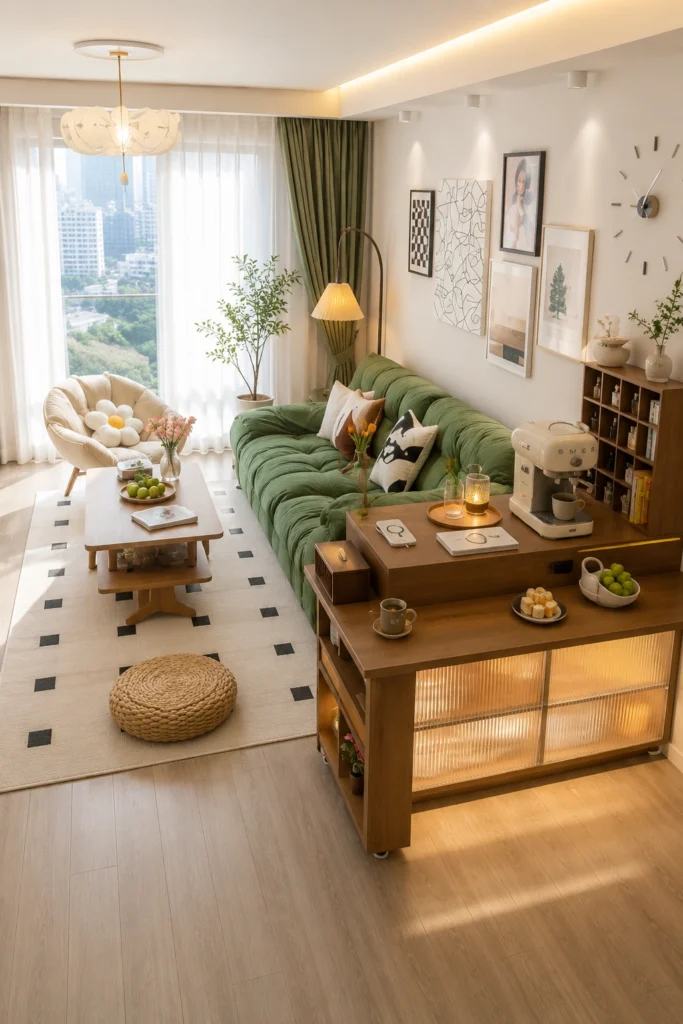
A rolling island can be a bar cart on Friday, a buffet table on Saturday, a coffee station every morning, and a desk surface when you need one. One piece, four jobs. That’s how studio living should always work.
Budget vs. splurge: Save on the wheels themselves — IKEA has rolling carts for under $40. Splurge on a solid-wood top if you can swing it; it’ll outlast everything else.
7. Work With Your Studio’s Shape, Not Against It
Long and narrow? Square and boxy? L-shaped with a weird nook? Each shape wants a different layout. Narrow studios usually work best with everything pushed against the long walls and a clear walkway down the middle. Square ones love a central rug with furniture floating off the walls. L-shapes are gifts — that “extra” leg almost always becomes the perfect sleep nook.
Don’t fight your floor plan. If your studio is narrow, lean into the railroad layout. If you have a quirky corner, make it the reading spot. The “weird” parts of small apartments are usually where the most character lives.
8. Let One Zone Have All the Personality
In a small space, every room is the room. You can’t have a moody, dramatic bedroom and a bright, airy living room — they’re the same room. So pick one mood and commit. If you want sun-drenched and plant-filled, go all in. If you want cozy and warm, layer rugs, lamps, and textiles until the whole space hums.
The studios that look the best on Instagram and feel the best in real life are the ones with one strong point of view. Three styles fighting each other in 400 square feet just reads as confused.
I once tried to do “modern Scandinavian living room with bohemian bedroom” in a studio. It looked like two roommates who didn’t get along. Pick a lane.
9. Layer Lighting (Skip the Overhead, If You Can)
Almost every studio has one harsh overhead light. Turn it off. Forever, if possible. Replace it with three or four smaller light sources scattered around the room — a floor lamp by the sofa, a small lamp on the nightstand, a warm pendant over the table, fairy lights or a sconce somewhere unexpected.
Multiple low-level light sources do two things at once: they make a small space feel bigger (your eye reads the layers as depth), and they make it feel softer. A single overhead bulb flattens everything. Three pools of warm light make a studio feel like a magazine spread.
Pro tip: Use bulbs around 2700K — that’s the warm, golden glow that makes skin and walls look their best. Anything above 3000K starts to feel like a dentist’s office.
Final Thoughts
A studio apartment isn’t a starter space you have to survive until you can “upgrade.” With the right layout, it’s one of the most charming, functional, deeply personal kinds of homes you can have. The trick is to stop comparing it to a bigger apartment and start treating it like its own thing — a small, smart, beautifully zoned little world.
Pick one tip from this list. Just one. Try it this weekend. Move your rug. Add a tall shelf. Swap the overhead light for a lamp. You’ll feel the difference immediately, and the rest will follow on its own.
Your studio doesn’t need more square footage — it needs more intention. Start there, and a small space stops feeling small.