16 Cozy Studio Apartment Ideas with a Separate Sleep Zone
Living in a studio doesn’t mean your bed has to be the first thing guests see when they walk in. Here’s the thing — the difference between a studio that feels cramped and one that feels like a proper little home usually comes down to one move: creating a visual break between where you sleep and where you live.
These 16 ideas show you exactly how to do it, whether you rent, own, or just want to try something this weekend.
1. Frame the Sleep Zone with a Half-Wall Partition
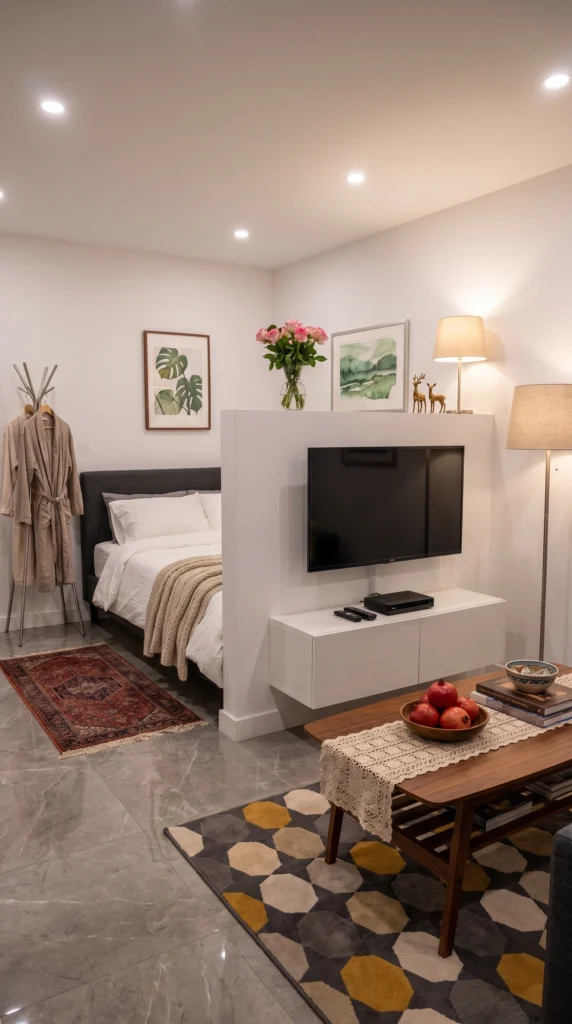
The half-wall partition is the smart compromise between an open studio and a full bedroom. One side mounts your TV and a floating console; the back tucks your bed out of sight from the entry. You still get airflow, ceiling continuity, and that lovely open feeling — but your bed isn’t the first thing guests notice when they walk in. It’s my favorite structural fix for studios.
Pro tip: Use the top of the half-wall as a shelf. A vase of flowers, a small lamp, and one framed print instantly make it feel intentional rather than utilitarian.
2. Use a Sculptural Shelving Unit as Art
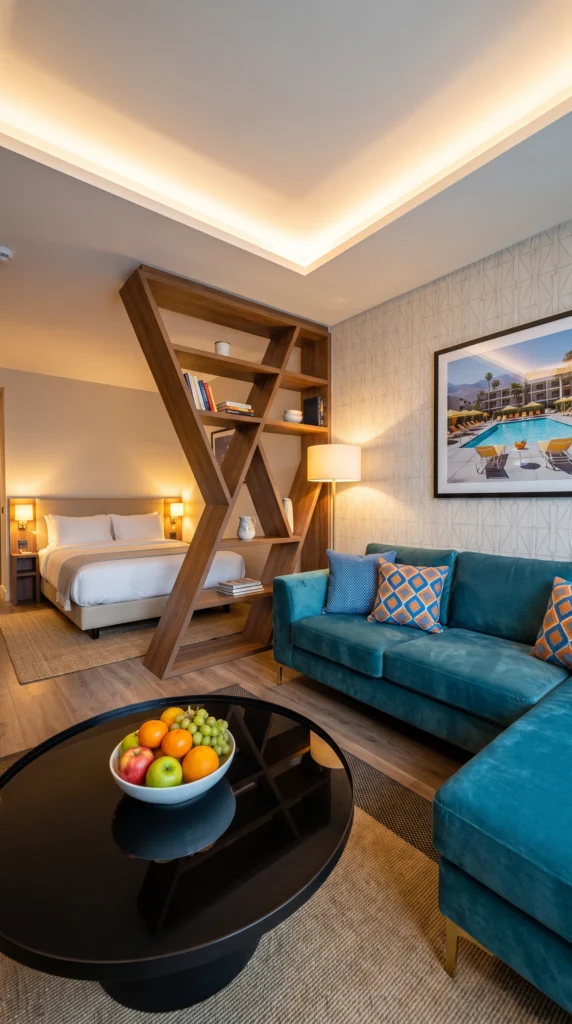
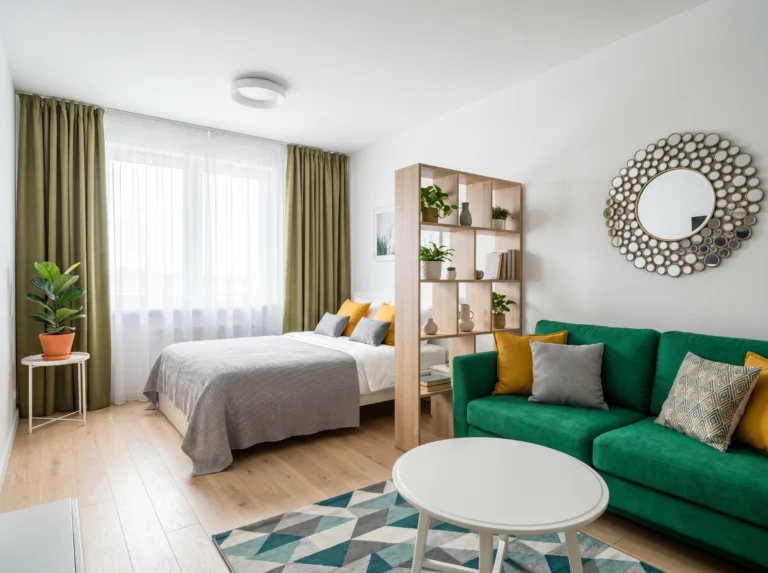
If you want your divider to feel like art, this is it. A sculptural wooden shelving unit — think angled, geometric, statement-making — separates the sleep zone from the lounge while still letting light pass through. Fill the shelves loosely: a few books, a jug, a piece of pottery. Overstuffed shelves lose the sculptural effect and just start reading as a wall of clutter you’ve inherited.
Sofia’s honest take: Statement dividers only work when the rest of the room is calm. Pair a piece like this with quiet bedding and neutral upholstery, or the whole space starts fighting itself.
3. Hang Sheer Curtains for Instant Softness
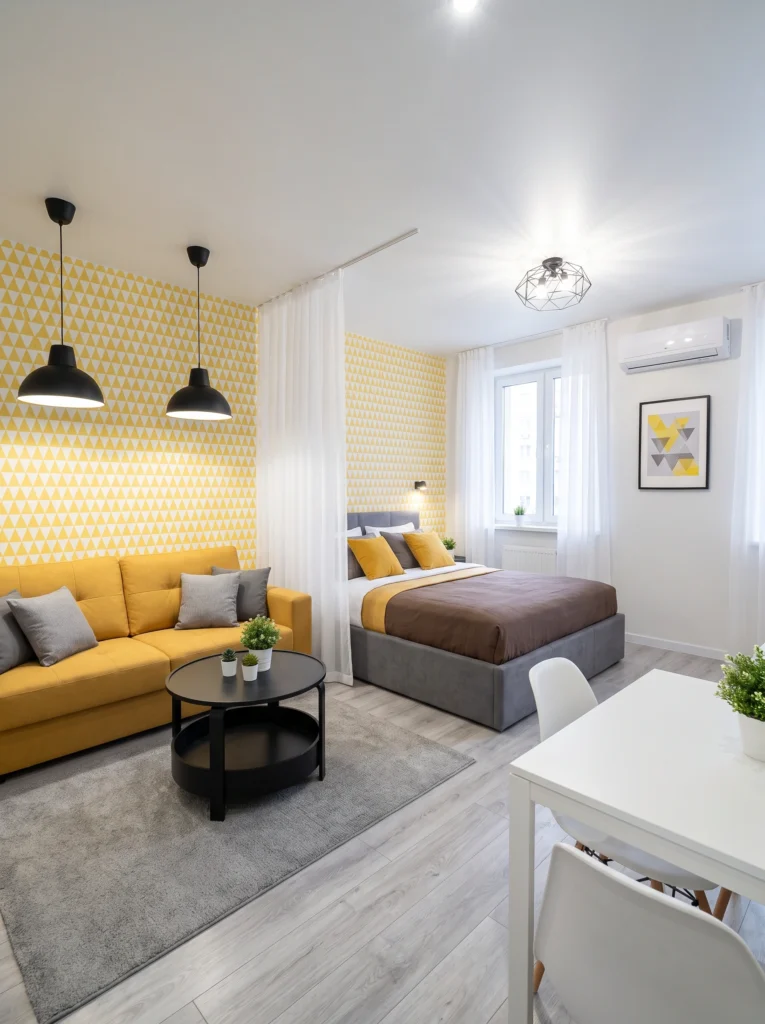
Sheer curtains are the softest, cheapest divider you can install in a single afternoon. Hang a ceiling track (or a tension rod if you rent), then let the fabric fall between your sleep zone and living space. Light still filters through, so nothing feels caged in — but at bedtime, you get instant separation. Pair with contrasting bedding to make the sleep side feel like its own little retreat.
Renter-friendly alternative: Skip the ceiling drilling and use a Kwik-Hang no-drill curtain bracket instead. It clips onto standard trim and holds a rod up to 20 pounds — great for lightweight sheers.
4. Slot a Kallax Between Bed and Desk
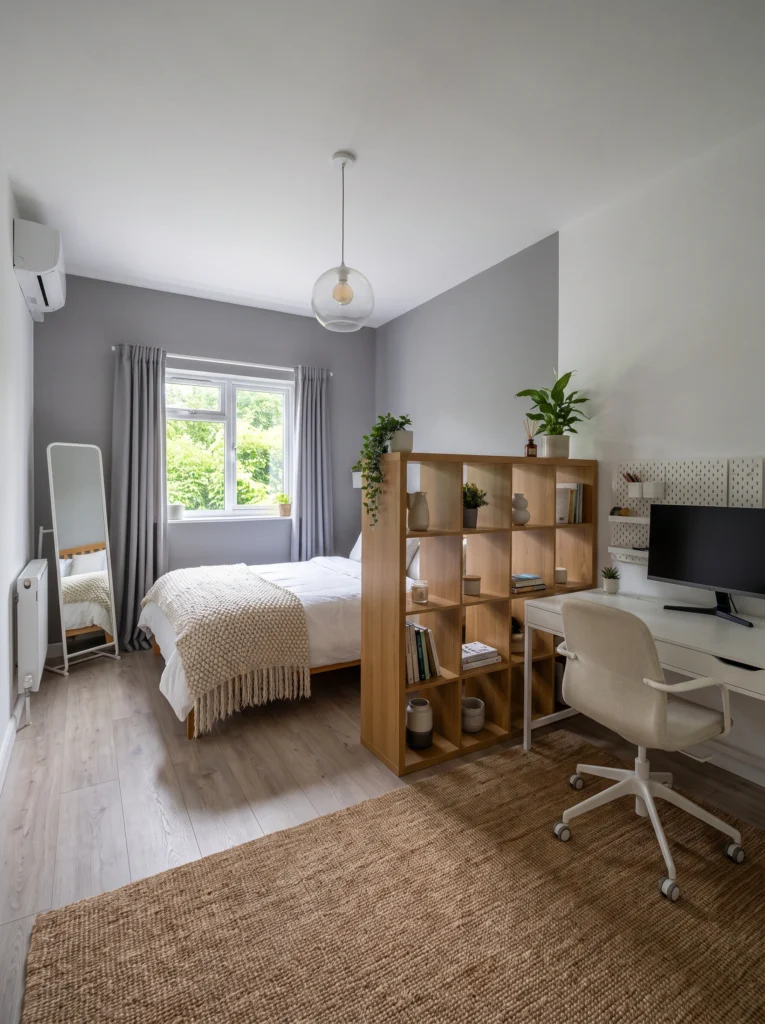
Working from a studio means your desk and bed are often uncomfortably close. A tall cube shelf between them fixes that in one purchase. You get storage on both sides, a visual break, and — importantly — a psychological line between “work mode” and “sleep mode.” Style the top with a trailing plant so it reads as decor from the desk side, not just office overflow you’ve stashed away.
My favorite: The IKEA Kallax in the tall 5×2 configuration. It hits about six feet, which is high enough to block sightlines when you’re seated but not so tall it makes the room feel walled in.
5. Add a Wooden Lattice Screen
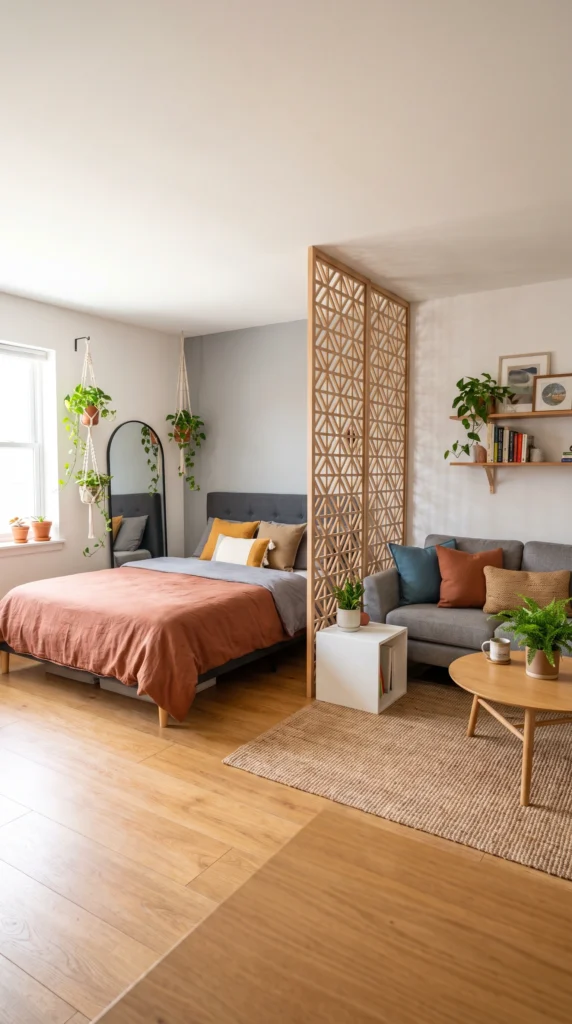
A wooden lattice screen brings pattern, warmth, and texture in one move. This one splits the bed from the living area without fully blocking the light — the geometric cutouts actually cast beautiful shadows on the floor in the afternoon. It’s a great pick if your studio leans boho or earthy. Just anchor it well if you have pets or kids; these screens are lighter than they look and can tip surprisingly easily.
Budget vs. splurge: Save on the screen itself (World Market and Wayfair carry lovely ones under $200). Splurge on a solid base or bracket to secure it — that’s where cheap versions fail.
6. Try a Laser-Cut Metal Panel
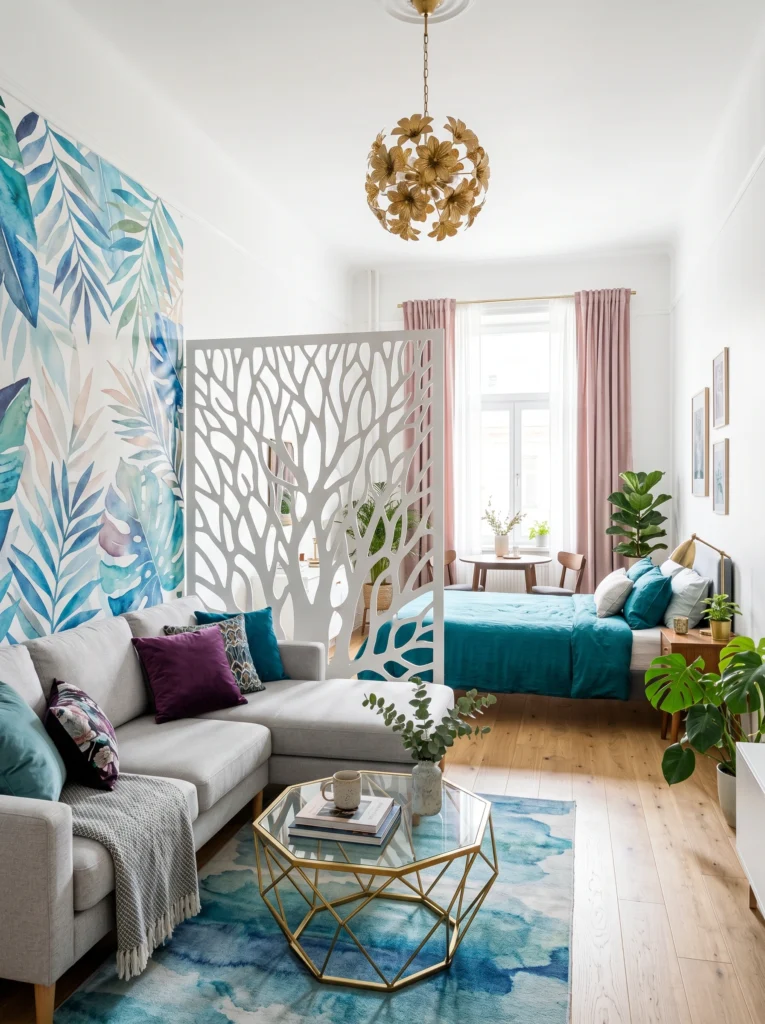
When you want your divider to double as sculpture, a laser-cut metal panel like this one delivers. The organic tree design breaks up the space beautifully without swallowing it whole. It works especially well in colorful studios where you want a bold decorative element that isn’t just more pillows or wall art. Buy freestanding if you rent; the wall-mounted versions require drilling and rarely come off cleanly at move-out time.
I’ve tested this: Metal panels look thin online but weigh more than you’d expect. Measure your doorway before you buy — I once had a beautiful screen sitting in the hallway for a week because it wouldn’t fit through my studio door.
7. Tuck the Bed into a Curtained Alcove
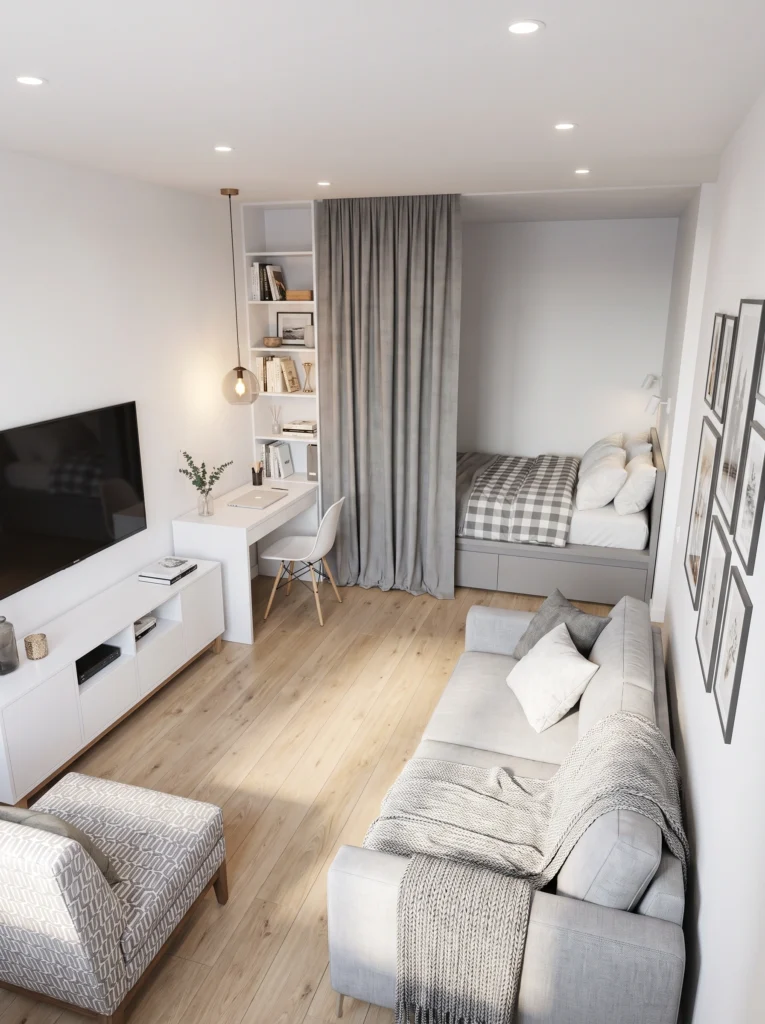
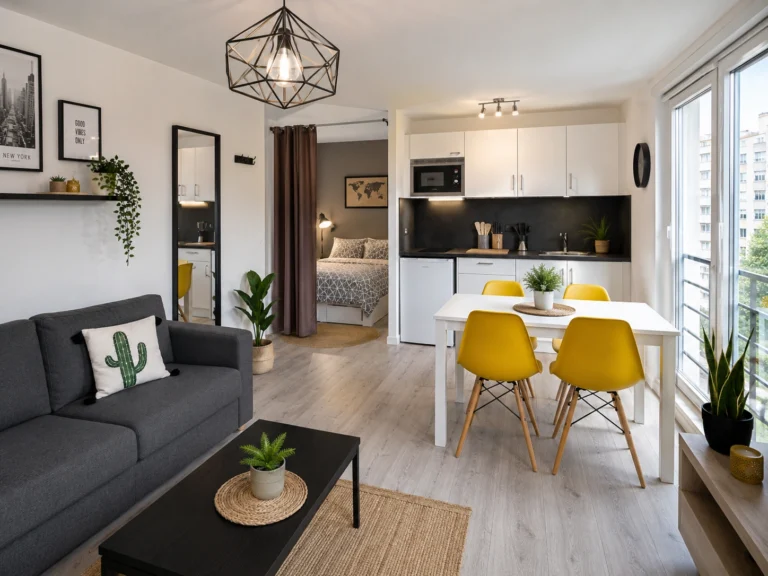
If your studio already has an alcove, nook, or recessed corner, use it. Hang a floor-length curtain across the opening on a simple black rod, and suddenly you have a proper little bedroom. Closed, it feels cocooned and private. Open, it disappears back into the room. This is one of the highest-impact, lowest-cost separations you can create — usually under one hundred dollars total from start to finish.
Pro tip: Go one shade darker on the curtain than your walls. It signals “different zone” without needing extra decor — your eye reads it as a natural boundary rather than a random hanging fabric.
8. Build a Curtain Wall from Ceiling to Floor
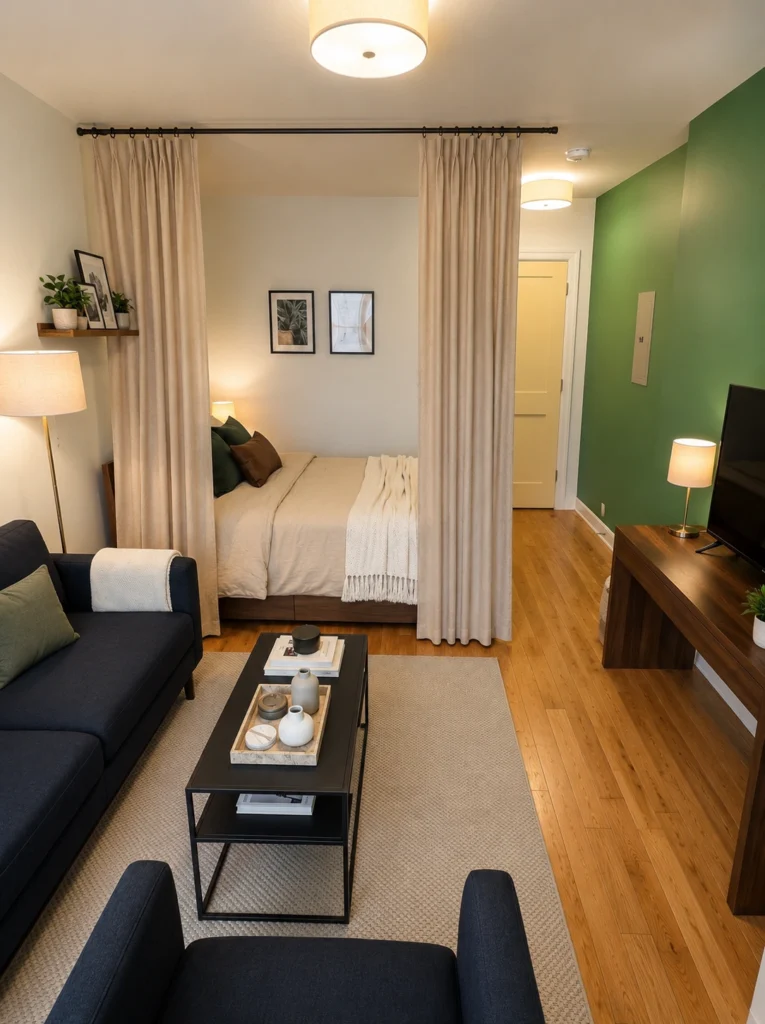
No alcove? Build one with curtains. A ceiling-mounted track running the full width of your room lets you draw a soft wall across whenever you want privacy. Choose heavy linen or blackout panels in a warm neutral — they’ll block light better and hang with more weight. When open, they stack tidily against the side wall. When closed, your bed truly disappears from view, hotel-suite style.
Renter-friendly alternative: Use a tension curtain rod between two walls if your landlord won’t allow ceiling tracks. It’s not as clean-looking, but it holds shockingly well and leaves zero holes behind.
9. Stick with the Classic White Cube Bookshelf
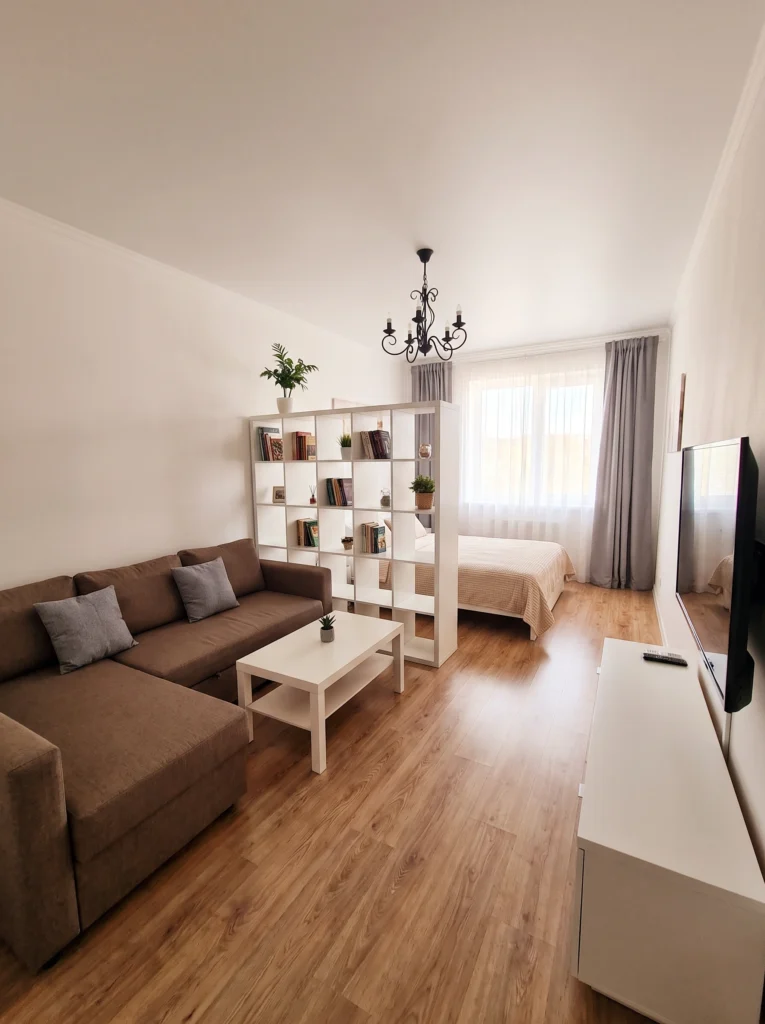
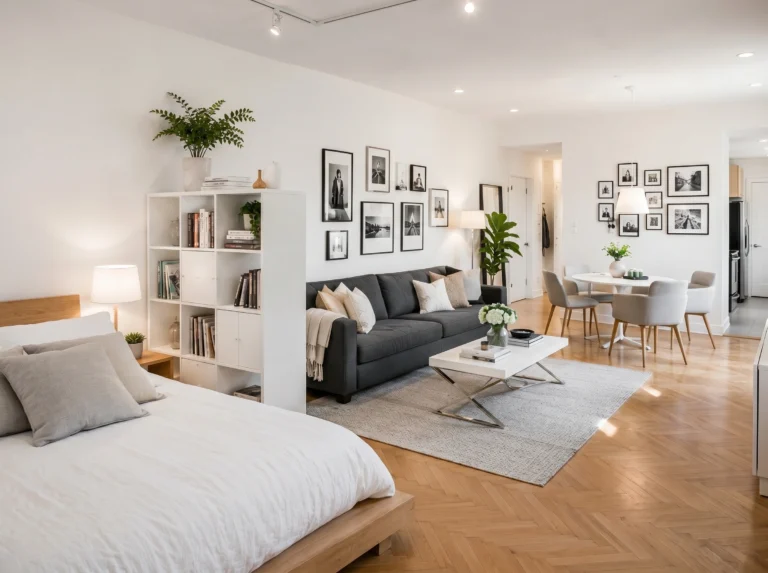
The classic IKEA Kallax as a room divider isn’t glamorous, but it works — which is exactly why you see it everywhere. It gives you real storage, blocks the bed from the sofa’s sightline, and stays comfortably under two hundred dollars. Fill it half with books and half with negative space so it doesn’t feel like a wall of clutter. Add one plant on top and it instantly reads intentional.
My tip: Anchor a Kallax to the ceiling or an adjacent wall with a small bracket. They’re notoriously tippy when loaded, and the last thing you want is a bookshelf falling on your bed.
10. Turn Your Divider into a Plant Wall
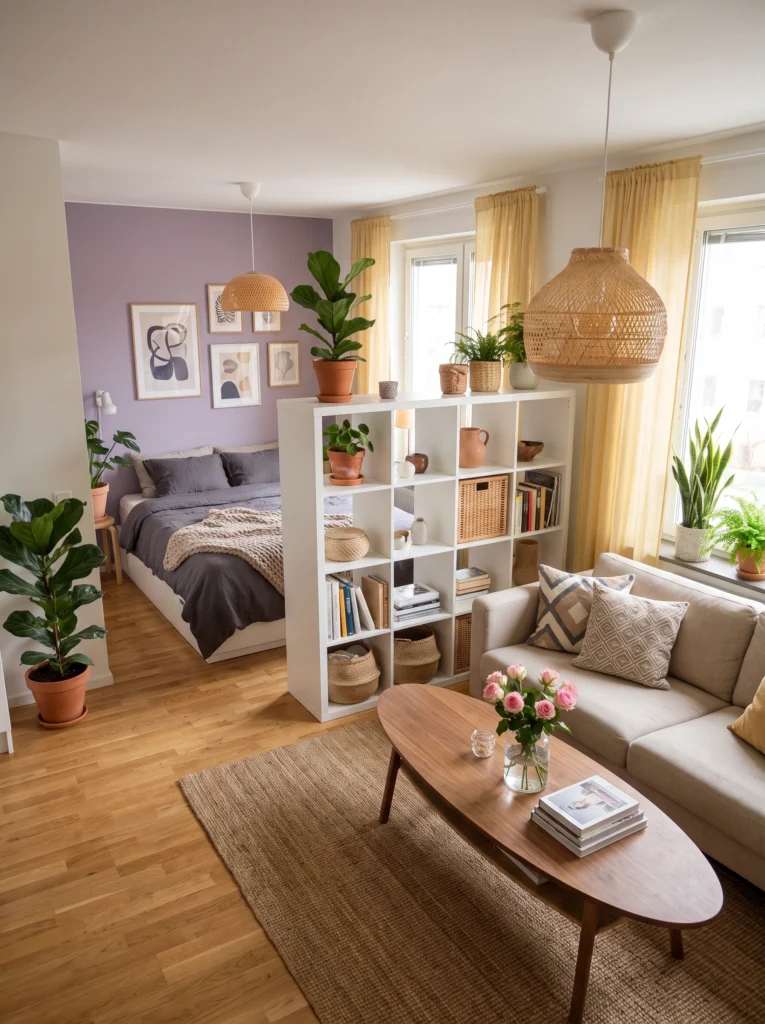
Take that same cube shelf and load the top with plants — trailing pothos, a small ficus, terracotta pots, a woven basket or two. Suddenly your divider isn’t storage furniture; it’s a living green partition. The plants soften the hard rectangular lines and add that lush, lived-in feeling studios often lack. Just make sure the shelf sits under a window or grow light, or your plants will sulk quietly.
Sofia’s honest take: Fake plants are fine on high shelves where nobody touches them. Up close, they always look plastic. Mix in one or two real trailing plants at eye level and the whole vignette suddenly reads real.
11. Go Warm with Natural Wood Tones
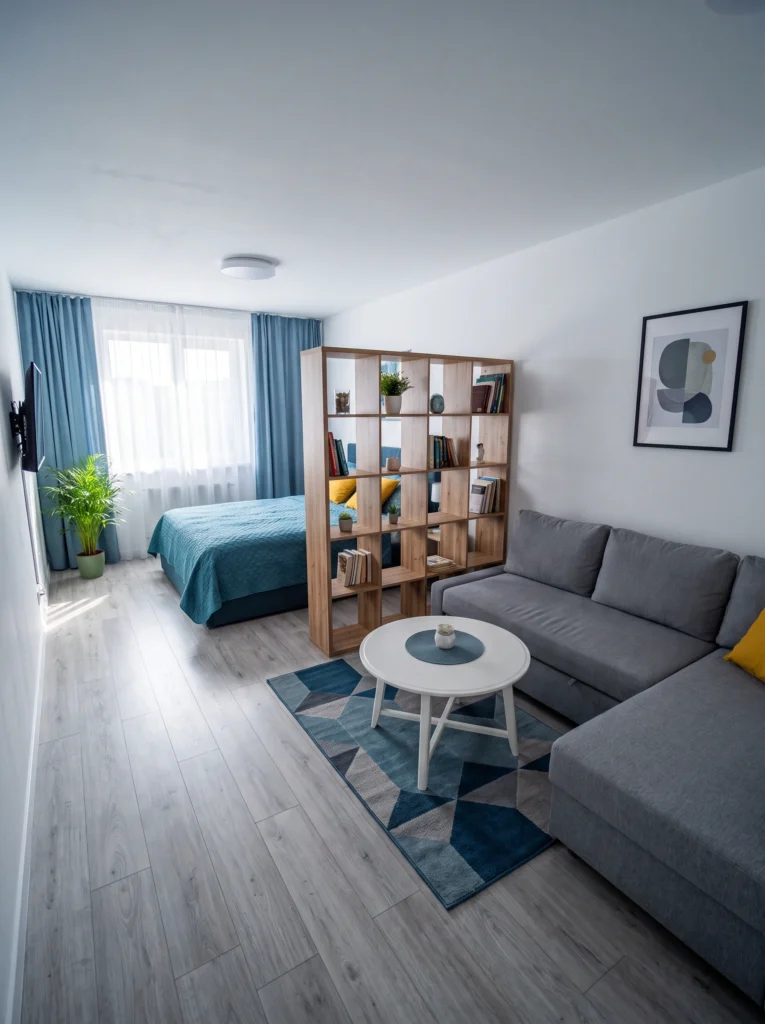
If white shelving feels too stark for your studio, go with a natural wood finish instead. This warm-oak cube divider does the same job — carving off the bed from the lounge — but reads softer and more Scandinavian. It pairs beautifully with pale floors and pops of blue or mustard. Style it with rounded objects (bowls, ceramics, books lying flat) to counter the grid; too many upright books can feel visually busy.
Don’t waste your money on: Cheap laminate “wood-look” shelves. The finish peels within a year, especially on edges, and the color never quite convinces. Real wood veneer at the same price point holds up dramatically longer.
12. Load the Divider with Woven Baskets
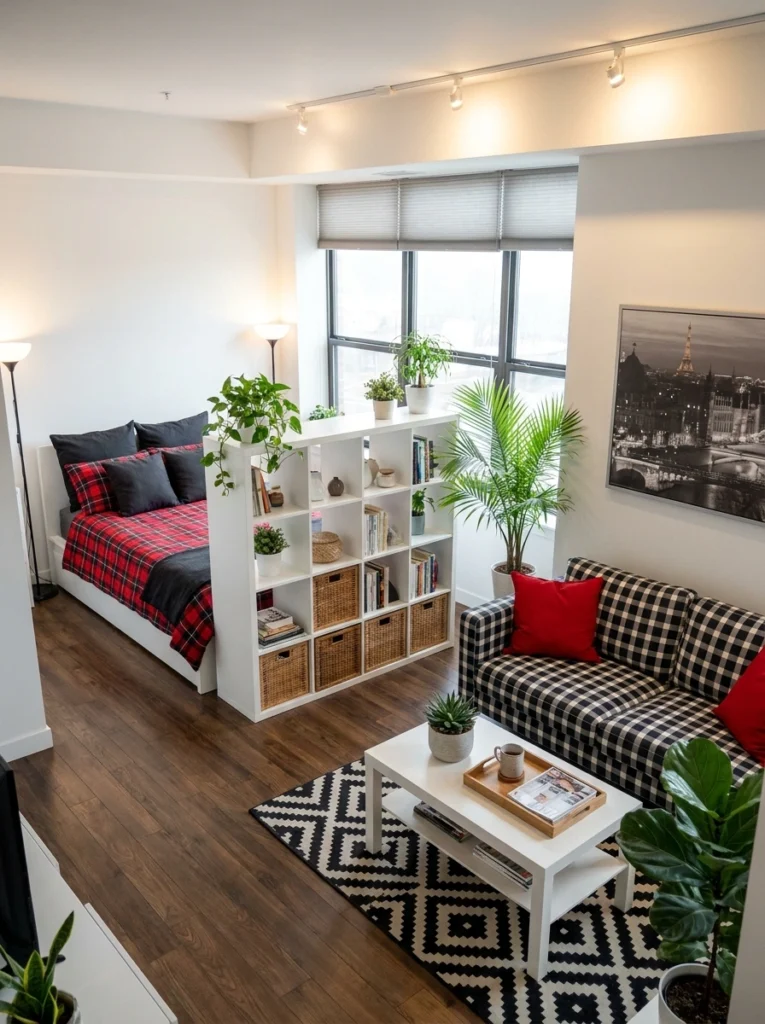
Storage-forward studios need every inch working. This white cube divider stashes woven baskets in the lower cubbies for shoes, blankets, and mail catchers, keeping the room-divider job while quietly solving your closet problem. Pair with a bold rug and patterned bedding to keep things from feeling utilitarian. Cube shelving looks best when about a third of the cubbies stay empty — resist the urge to fill absolutely everything at once.
Pro tip: Buy your baskets in one trip so the weave and tone actually match. Mixed baskets bought over time always end up looking like a mismatched flea market pile, no matter how nice each one is individually.
13. Choose Industrial Black Metal Framing
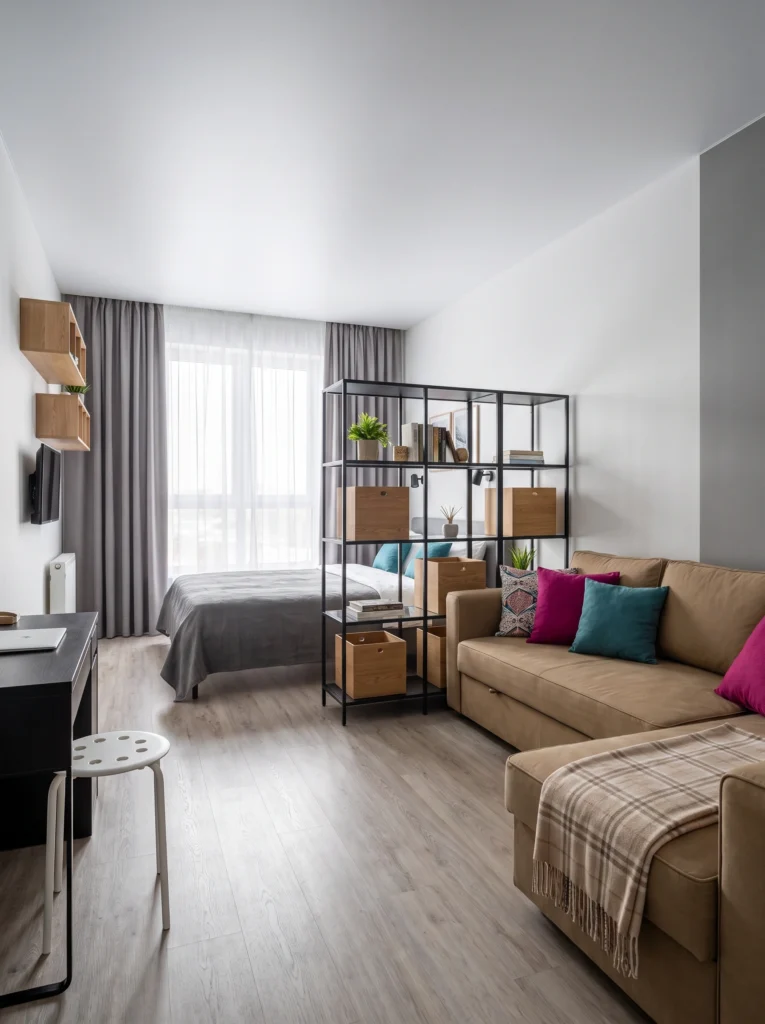
If your studio leans modern or industrial, swap the white or wood cube for a black metal-framed shelf. The airier open frame lets more light through, which matters in narrower studios like this one. Wooden storage boxes on the shelves add warmth so the whole thing doesn’t feel like an office supply catalog. Style with fewer, larger objects — small clutter reads as chaos through open metal frames, where every gap shows.
My favorite: The Vittsjö from IKEA. It’s about $80, holds a surprising amount of weight, and the black-and-glass look punches well above its price point in the right room.
14. Let the TV Console Do Double Duty
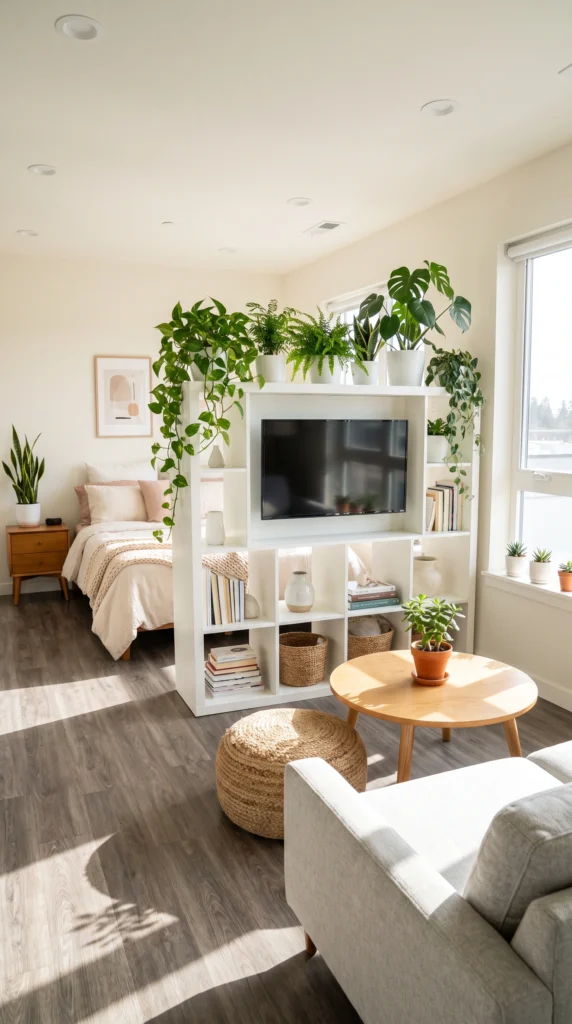
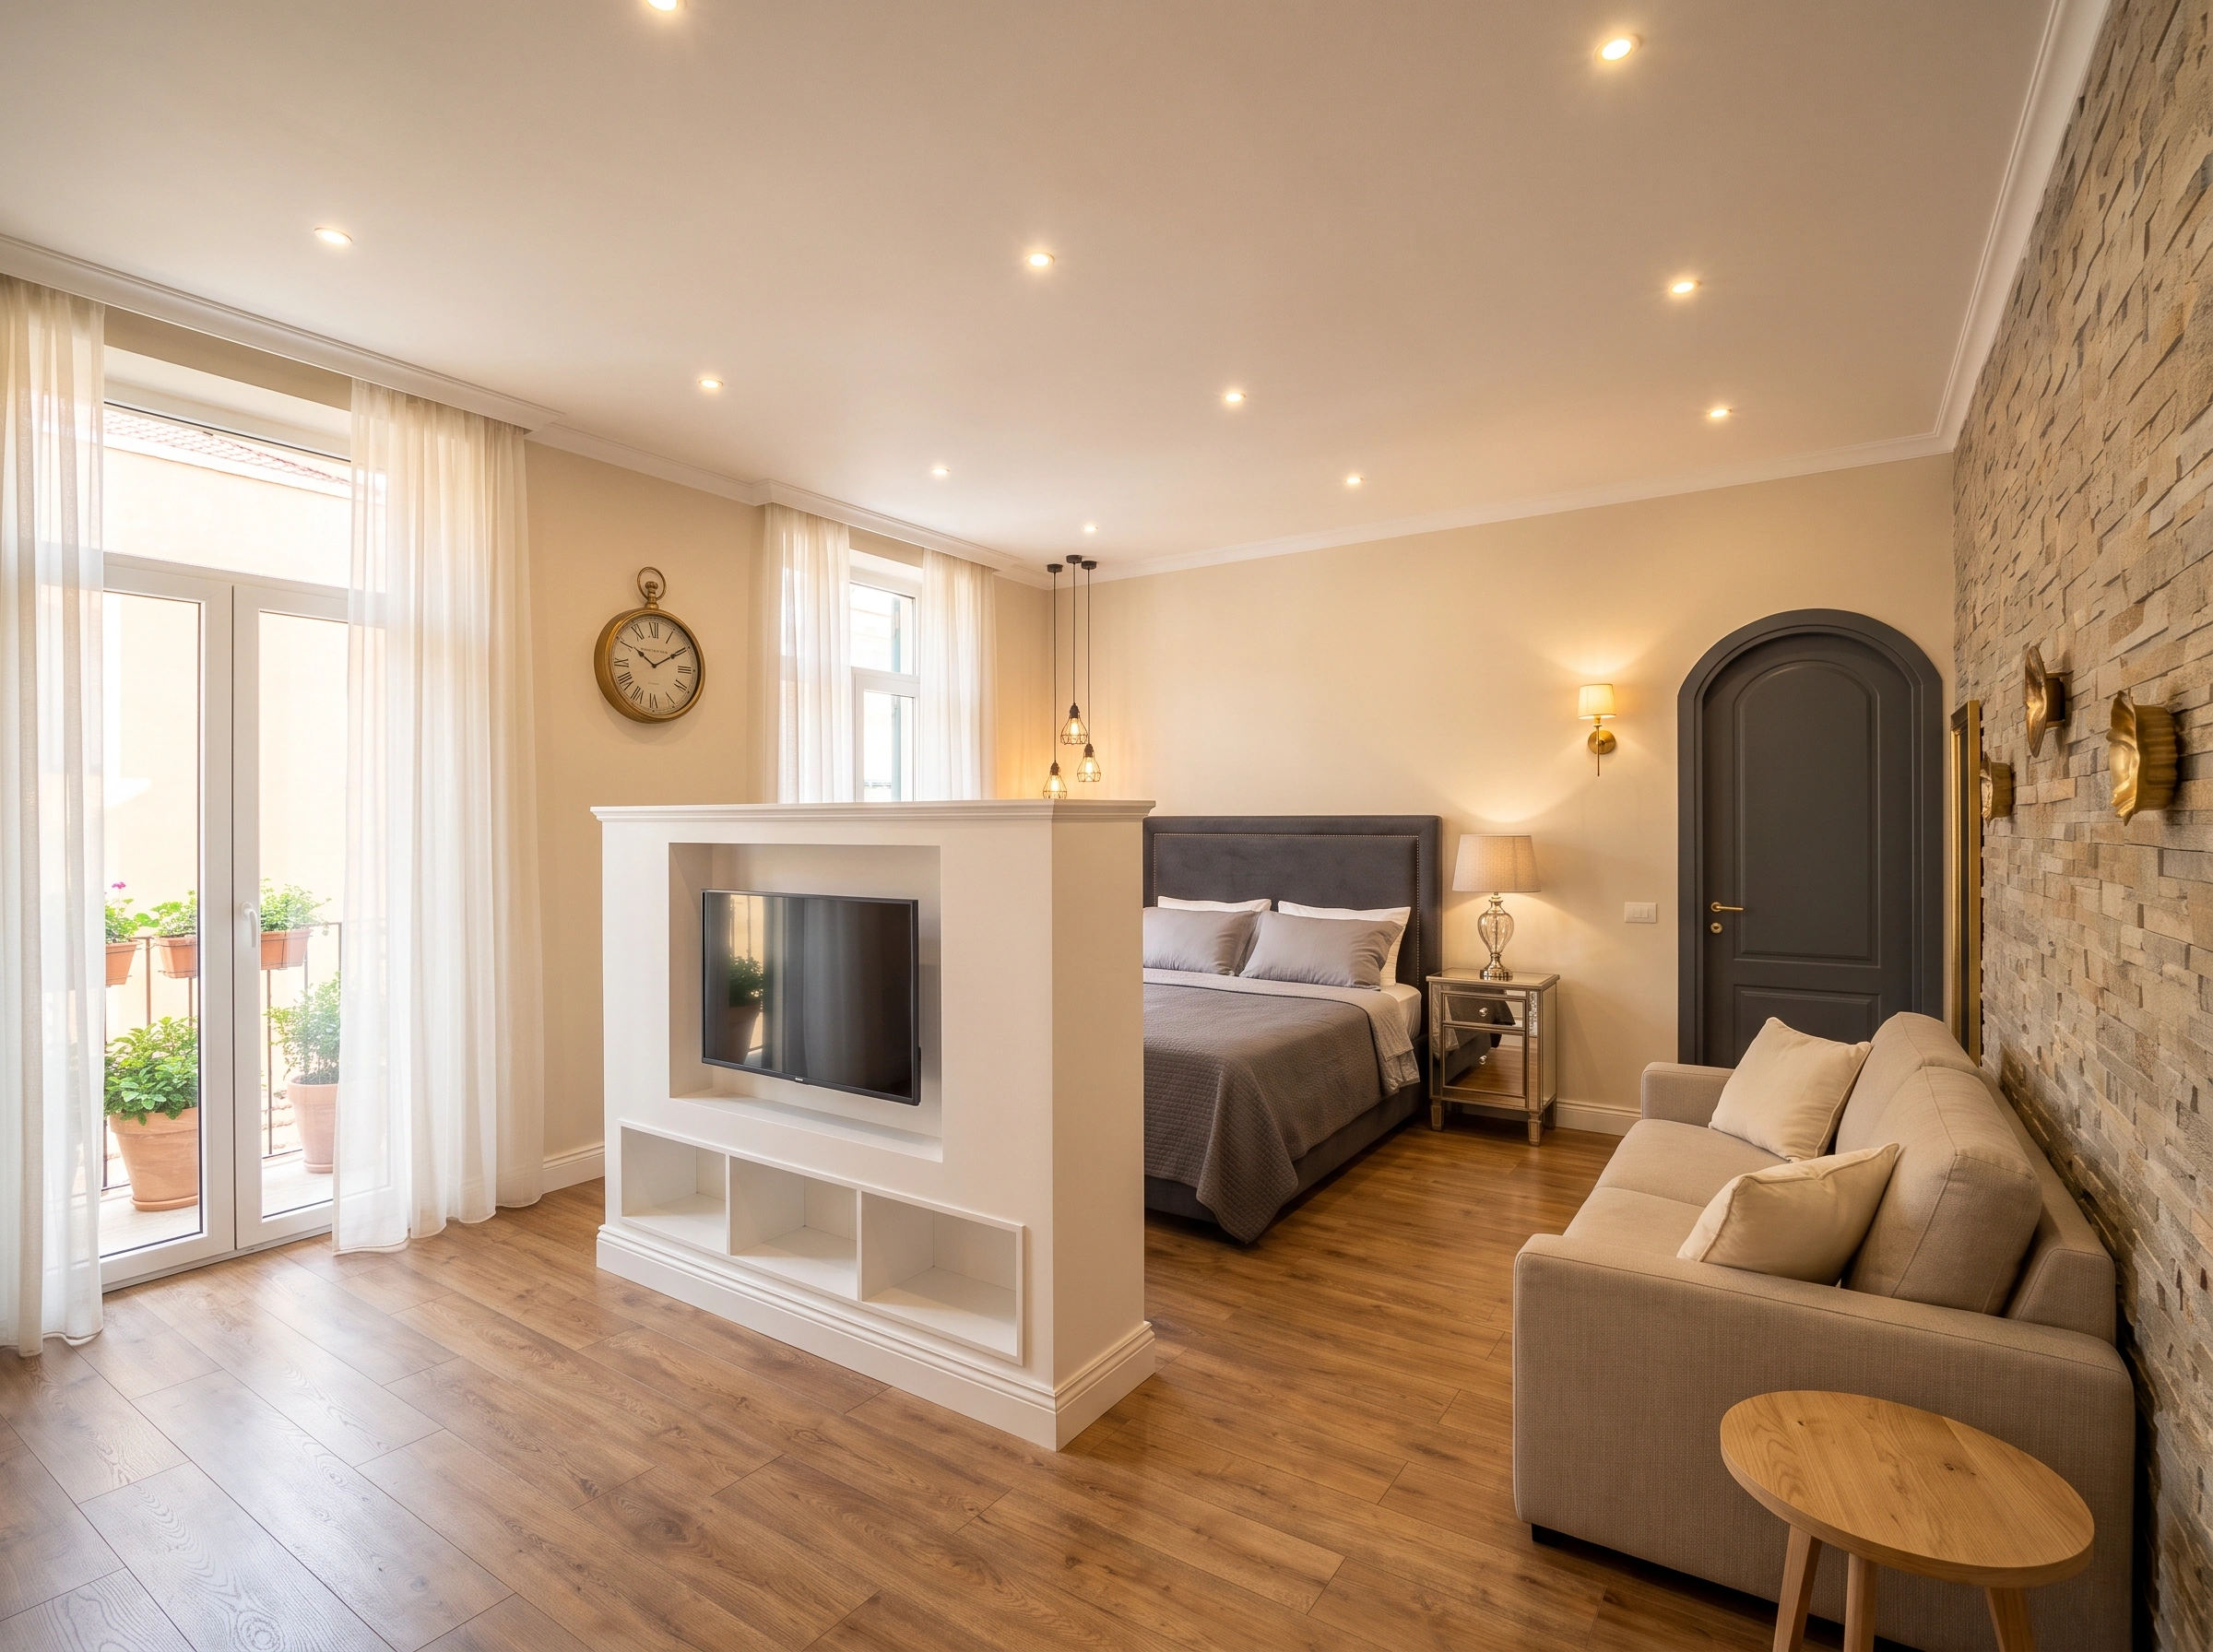
This is the ultimate double-duty setup: a low console with a wall-mounted TV facing the living side, cube storage below, and the bed neatly tucked behind. Plants along the top soften the whole structure and add visual height where it counts. It’s ideal if you don’t want to sacrifice your TV wall to a partition — the divider becomes your entertainment center on one side and a calm bed backdrop on the other.
Sofia’s honest take: Wall-mounting a TV on a freestanding divider is trickier than it looks. Make sure the piece is rated for the TV’s weight, or spring for a professional mount — a falling TV isn’t a decor problem, it’s an emergency.
15. Install Vertical Wooden Slats
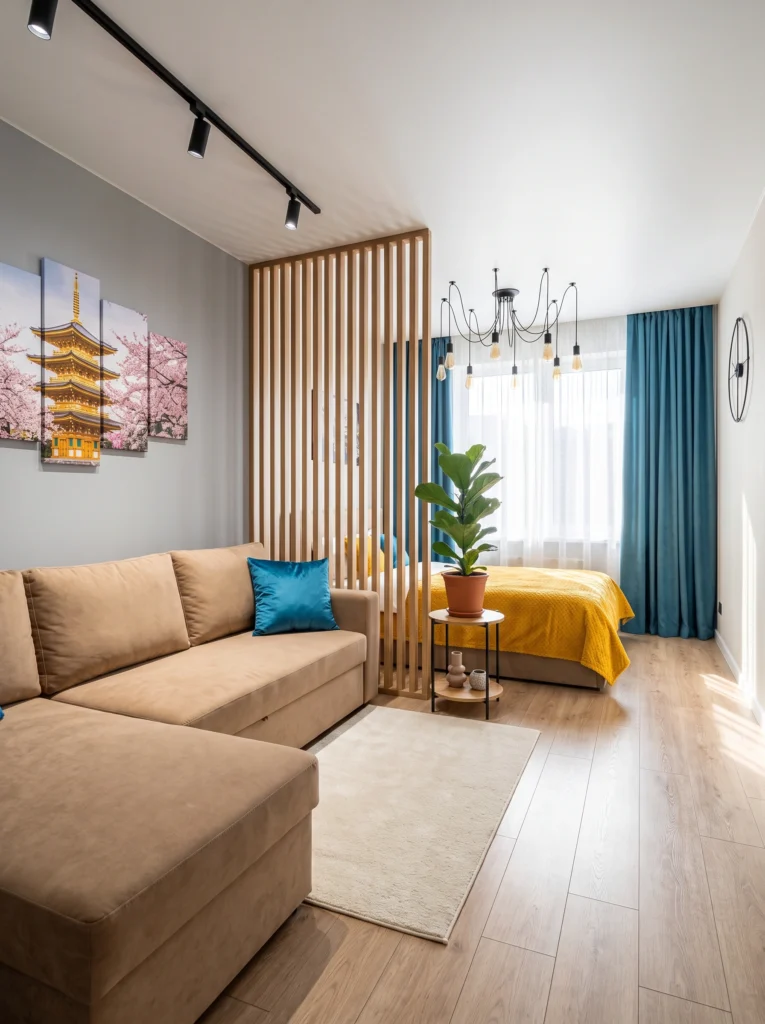
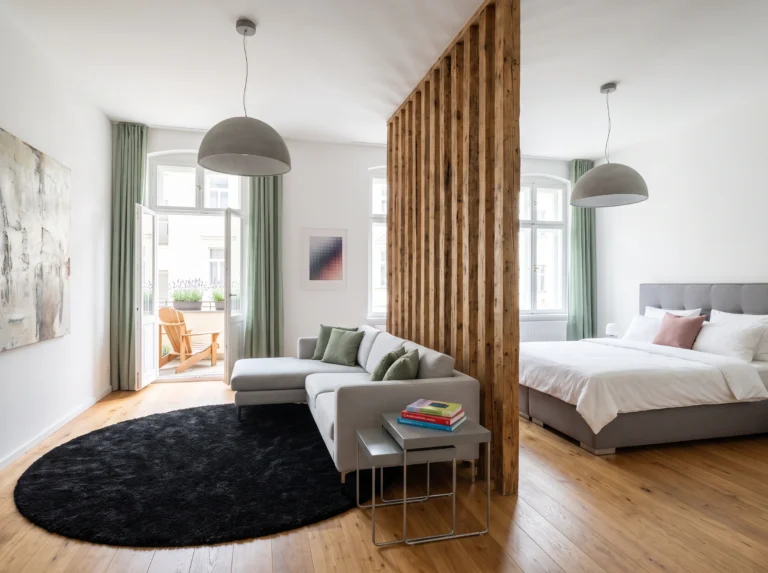
Vertical wooden slats are having a real moment, and for good reason. They divide a space visually while barely occupying any floor area, keep sightlines and airflow open, and add serious warmth. This Japandi-style slatted partition suits studios where you want a modern, clean-lined feel without full walls. Choose slats spaced at least an inch apart — pack them any tighter and you lose the light-filtering effect that makes them special.
Renter-friendly alternative: Freestanding slatted screens exist on Amazon and Etsy in the $150–$300 range. No drilling, no permanent install, and you can take the whole thing with you when your lease ends.
16. Try a Stepped or Cascading Shelf
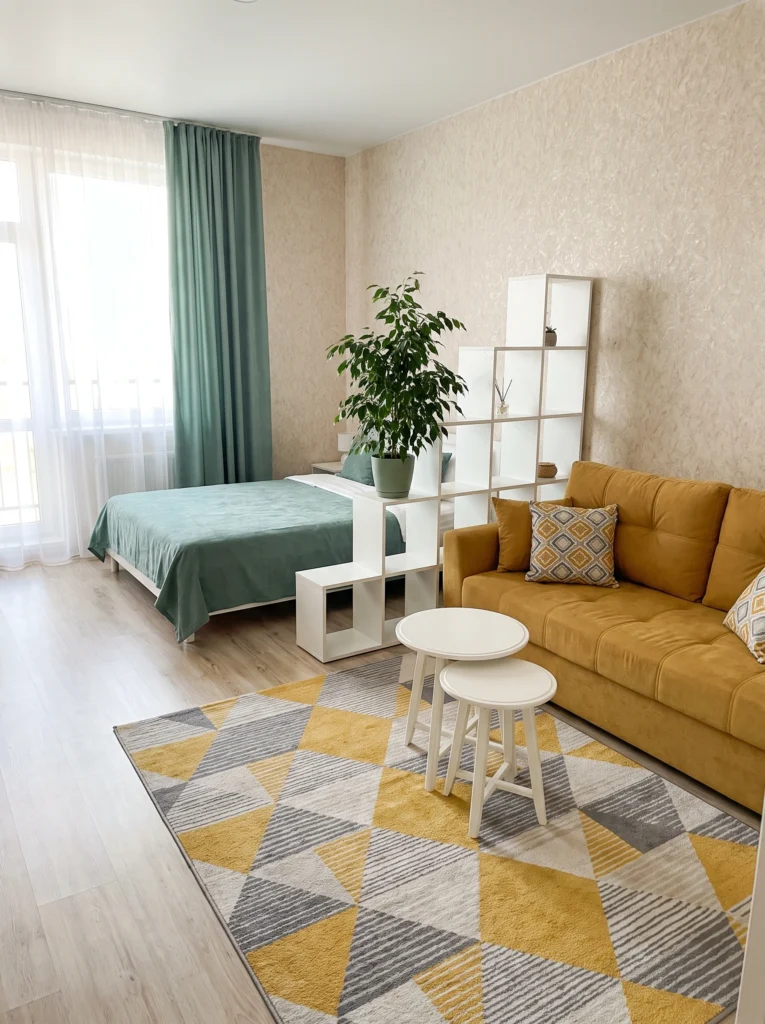
A stepped shelf divider (like this cascading white one) is a clever pick when a full-height wall would feel oppressive. It breaks up the space at bed-height without cutting the room in half. You get a mini display area for plants and books, plus a visual pause between zones. It also works well in studios with tall ceilings — where a low divider keeps that airy, spacious feeling intact.
Budget vs. splurge: Save on the shelf itself (IKEA and Target both do stepped versions under $120). Splurge on what goes on it — one really beautiful ceramic vase or lamp elevates the whole look far more than five cheap knick-knacks.
Final Thoughts
Here’s the thing about studio living: the goal isn’t to pretend you have more rooms than you do. It’s to make the one room you have feel like it works for every part of your life. A separate sleep zone — however you create it — gives your studio a rhythm. Somewhere to be awake, somewhere to be asleep, and a soft line between the two.
Pick one idea from this list. Just one. Try it this weekend, and see how differently your space starts to feel.
Your studio doesn’t need to be bigger — it just needs to feel like more than one room. Start with the divider, and everything else falls into place.